Granular permissions with Laravel APIs & React frontend

In this article, I’ll explain how to implement the granular permissions system using Laravel APIs as our backend and React.js as our frontend (separated app) ..
Since we have our frontend separated from our backend connecting through the APIs, we won’t use Laravel blade views as the common way.
Introduction
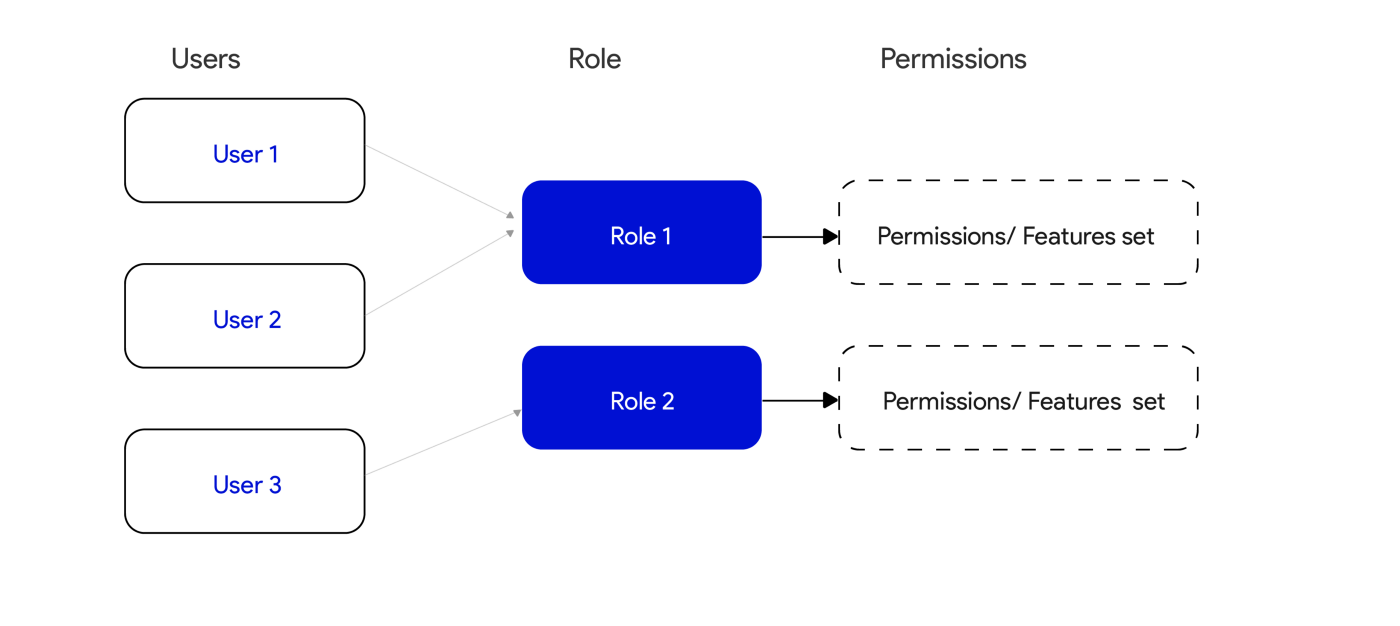
In many web applications, we have a roles & permissions system .. that each user has a role, and each role has its own permissions, then each permission is used to authorize a specific feature in our app, as explained in the picture below:
Ok, but!! .. what is granular permissions 🤔?
Generally, granular permissions refers to privileges granted by a system to you that allow you to construct site-specific roles based on certain requirements. — source
With granular permission you can have different content in the same view from one user to another according to their permissions granted.
For example,
We have an application with two users:

As you can see in the picture above,
— The user with admin role has full access (all permissions) .. so he can access, create, update, delete, or comment on a post as well as users and other sections.
— The user with editor role has limited access (limited permissions) .. he can only access the posts view and edit them.
So, the idea behind the granular permissions is that we have control over our views according to system’s permissions set, and show/hide a specific feature in the view according to user’s permissions granted.
The Backend
We are going to work on an existing Laravel app (a backend API) I created, with authentication implemented by using Laravel Sanctum.
This api (Laravel App) contains only two models:
— User model.
— Post model.
with their Controllers, Resources, migrations, seeders, and routes all are ready.
Nothing too complicated! only an backend APIs to get, create, update and delete posts with users and authentication with API tokens.
The source code will be included at the end of this article on Github.
Now, let’s write some code!
Ok, now its time to move our hands 🖐 and write some code🤓
In Laravel, it is very easy to implement such a system with the help of @spatie/laravel-permissions package, it help us to easily manage user roles and permissions in a very simple way ..
let us first install laravel-permissions package in our app (you can follow the official docs):
composer require spatie/laravel-permissionthen we have to publish the (config, migrations):
php artisan vendor:publish --provider="Spatie\Permission\PermissionServiceProvider"then run the migrations:
php artisan migrateNow we need to create all the permissions required by our app as our needs, then create a roles and give them a permissions .. then assign the roles to specific users,
Let’s create a seeder file to do that, run the following command:
php artisan make:seeder PermissionsSeedera seeder class will be created at database/seeders/PermissionsSeeder.php , open it and inside the run method we write our seeding code..
you can follow the code below:
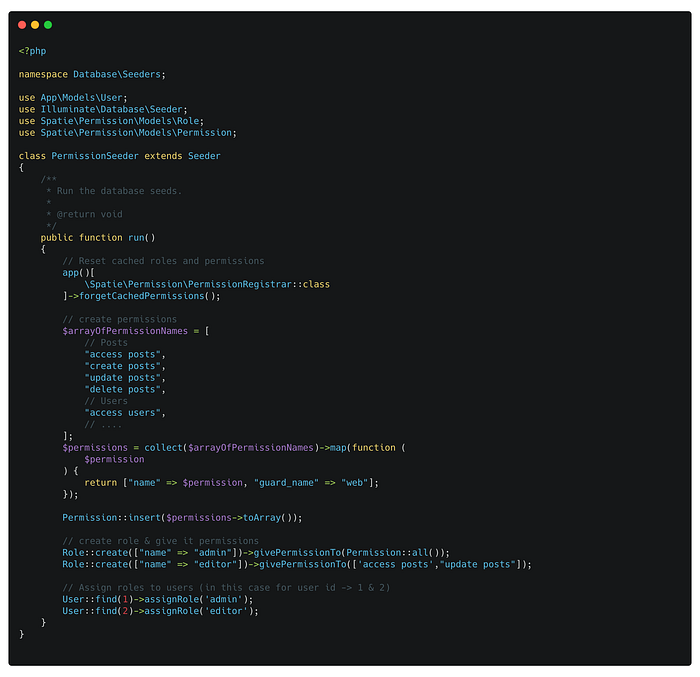
Explaining the seeder class above:
- First, reset cached roles and permissions if needed.
- create an array of all our needed permissions in our app, then store them in the database.
- create 2 roles (admin with full permissions, editor with only two or limited permissions).
- Last thing, assign a role to a user .. user 1 as admin and user 2 as editor.
Then, we need to call the PermissionsSeeder.php class inside the run method of database/seeders/DatabaseSeeder.php as the following:
public function run(){     $this->call([          UserSeeder::class,
          ...          PermissionsSeeder::class,     ]);}
Don’t put the UserSeeder (if exists/you have) after the PermissionsSeeder, because remember the users assigned at PermissionsSeeder (1 & 2)
Then run the seeding command:
php artisan db:seedNow we have our users with their roles & permissions set 🤓 🎉
- User 1 as admin with all permissions
- User 2 as editor with 2 permissions only.
Two more steps left, to finish the backend side!
- Step 1 — Authorize user actions against a given resource with our app APIs (because we NEVER TRUST CLIENT).
- Step 2 — Return user’s permissions when authenticated, to use them later in our frontend.
Step 1
With Laravel you can authorize user actions against a given resource with two primary ways (using Gates, Policies) .. check out the official docs.
It’s up to you and your case, in my case I’ll authorize user actions using Policies via User Model
Example:
In my PostController.php, User have to be authenticated (Logged in) and authorized (has permission to access posts)
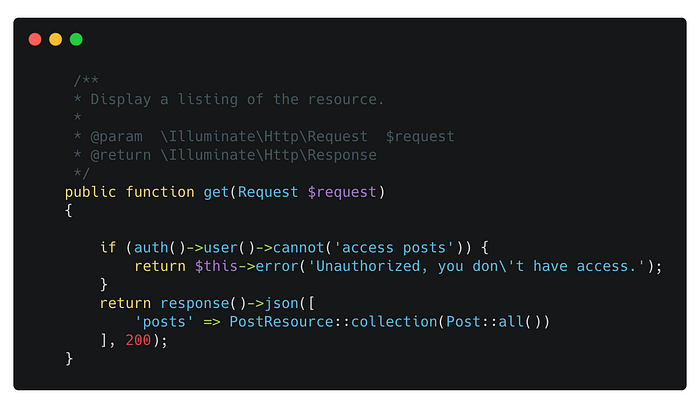
and so on for other controller’s methods to be authorized.
Step 2
I have a GET endpoint which is (/auth/profile) to get the authenticated user’s data by the access token sent along with the request, then it respond with user’s data .. that’s fine, but I need to get user role and permissions with the user’s data returned.
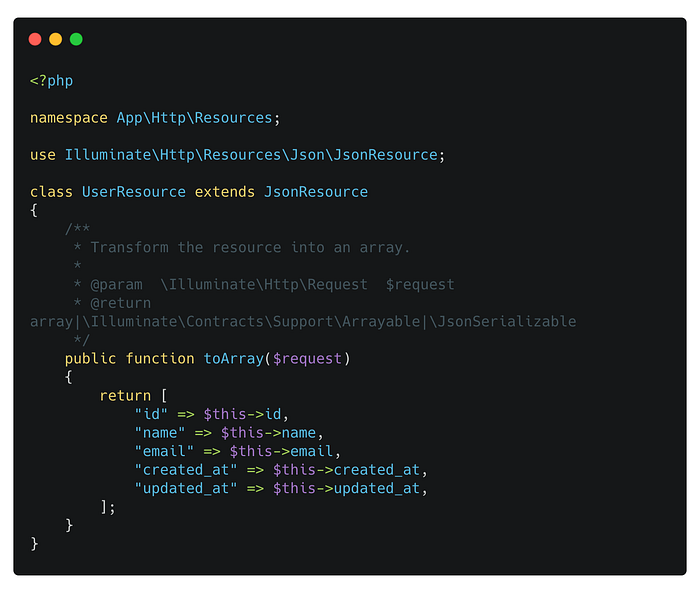
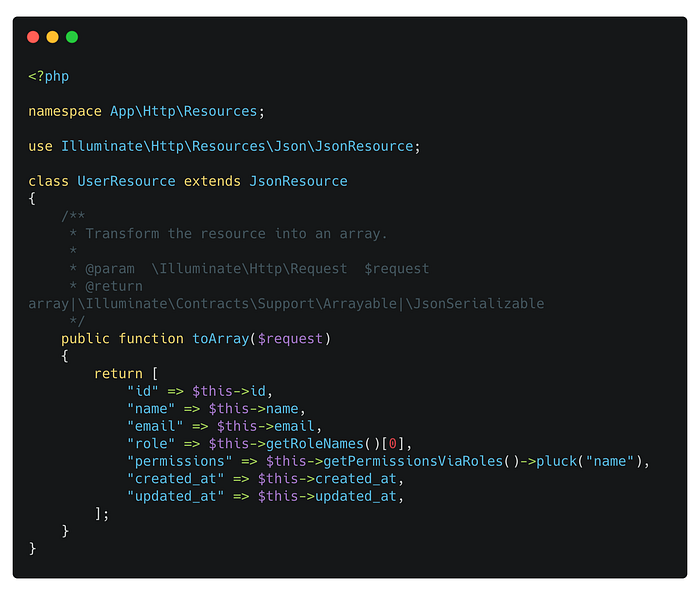
I’m using Laravel resources to transform the response data, so I have created a resource for Users called UserResource.php .. then in my AuthController.php @ profile method, I have returned the authenticated user’s data using this resource as showing below:
return response()->json([ ‘user’ => new UserResource(auth()->user())], 200);
My current UserResponse.php
As I said before, I need to add the user’s role and user’s permissions because we gonna need them at the frontend side.
so, it would be as the following:
Thats it for the backend side.🤓 ✅
The Frontend
First, let me explain the common way to use permissions in our views to show/hide a specific feature according to user’s permissions granted
The common way is by using Laravel Blade Views .. it is very easy with Blade directives (can, cannot, role, hasrole … etc)
Example:

But in our case, we are using React.js as a separated app from Laravel, connecting through the APIs .. so we don’t have Blade directives for authorization!
That’s why in the Backend section (STEP 2) we returned all the permissions of the authenticated user and his role.
Let me explain
In my React app, when a user login using the (/auth/sign-in) API endpoint, I store the login token using the Cookies, not storing user’s data .. so I need on page load to get the logged in user’s data then store it in the state management (Redux, Context API, …etc).
So, how to get the logged in user’s data?
Using the API endpoint (/auth/profile) .
By sending a GET request to (/auth/profile) with the token we stored in the cookies, we get a response like:
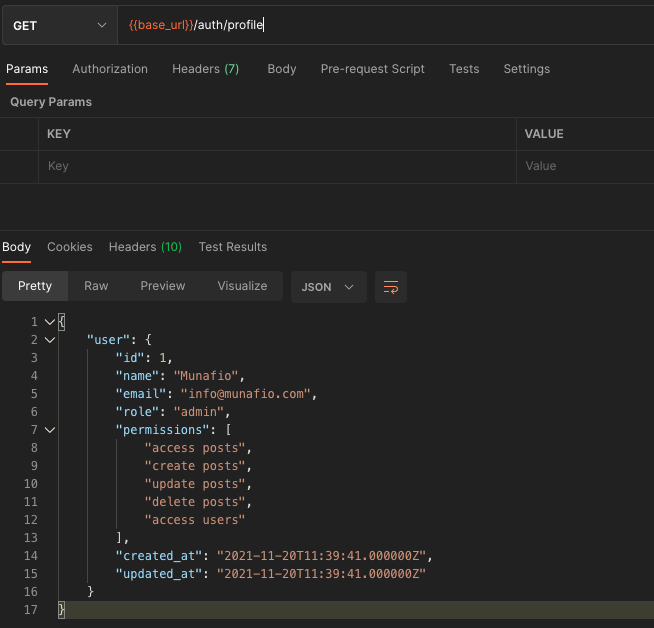
we store user’s data in our state management (in my case Context API) so we can then access user’s data anywhere in our app.
Last step, we can implement our own (can, cannot, hasrole … etc) methods so we can use them to authorize a specific feature according to users permissions same way as Laravel blade directives.
Example of implementing (can) method:
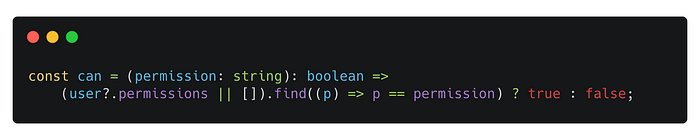
Put this method in the same place where you get user’s data (in my case at the Auth context of my state management) because it requires user’s data (permissions) to check on.
then we just have to import the (can) method anywhere in our app and use it as the following:
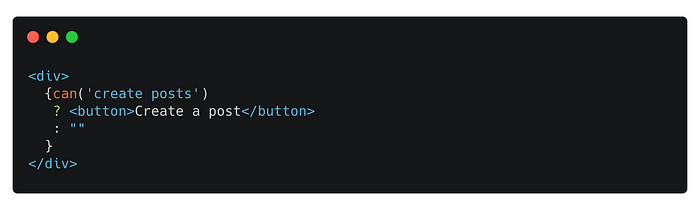
That’s it, we are all done!
You can implement the same approach with Vue.js/Angular.js/Svelte.js ..etc, its not just for React.js .. this was just an example of how to do it using APIs with separated frontend app from Laravel.
Advanced
After that, you can build a dashboard to control and (create/update/delete) roles and their permissions and assign a role to a user easily .. something like this:

by creating an endpoint to get role’s permissions grouped by section (products, posts …), then on update sync the permissions to the role using
$role->syncPermissions($request->permissions);and so on.
That’s it for today, thank you for your time and see you in the next articles 👋❤️
Don’t forget to check out my Github account, and follow me on Twitter 😁❤️